Introduction
In this tutorial, we will create a field widget for markdown content. The goal is to use Test Driven Development to make a robust module that we will improve in each chapter of this series.
We will walk through experimentation, the discovery of the core Odoo Javascript Framework and, refactoring. This series is made to be followed along, the source code of the module is available but the learning experience comes from the journey of writing tests that fail, making them pass, refactoring, and writing new tests.
We will not write our own JavaScript Markdown Editor, there is plenty of them out there. Instead, we will focus on using one that is battle-proven and usable in production and plug it inside Odoo JavaScript so it will be usable as a field Widget.
SimpleMDE
There is a lot of awesome JavaScript markdown editors but I settled for simpleMDE as a very easy embeddable Markdown Editor.
We will use simpleMDE underlying API to show content in Markdown into HTML when we see the field in read-only mode:
SimpleMDE.prototype.markdown("# My heading")Will transform the Markdown content into <h1>My heading</h1>
And then to use the WYSIWYG editor we will use the library like that:
$textarea = $('textarea');
markdownEditor = new SimpleMDE({element: $textarea[0]});
// we now have access to events:
markdownEditor.codemirror.on("change", function(){
	console.log(markdownEditor.value())
})
Odoo widget module structure
This is the end result structure of our module:
├── LICENSE
├── README.md
├── __init__.py
├── __manifest__.py
├── static
│   ├── description
│   │   └── icon.png
│   ├── lib
│   │   ├── simplemde.min.css
│   │   └── simplemde.min.js
│   ├── src
│   │   ├── js
│   │   │   └── field_widget.js
│   │   └── xml
│   │       └── qweb_template.xml
│   └── tests
│       └── web_widget_markdown_tests.js
└── views
    └── templates.xml
Writing our firsts JavaScript tests
We are going to use TDD for the creation of our widget and in the spirit of TDD, we are writing the tests first.
There will be two basic tests:
- On the form view, in read-only mode, the markdown content should be transformed into HTML, so a basic example test will be to check if the content of
# My heading will be transformed into <h1>My heading</h1> by the simpleMDE library.
- In edit mode, we should check that the simpleMDE WYSIWYG is correctly loaded
Including our test suite
First, we declare our tests inside views/templates.xml
<?xml version="1.0" encoding="UTF-8"?>
<odoo>

    <template id="qunit_suite" name="web_widget_markdowntest" inherit_id="web.qunit_suite">
        <xpath expr="." position="inside">
            <script type="text/javascript" src="/web_widget_markdown/static/tests/web_widget_markdown_tests.js" />
        </xpath>
    </template>

</odoo>
Every time you add JS tests to your module, the mode itself should have web as a dependency, as you see we inherit the web.qunit_suite template.
Creating our JavaScript test file
Then we create our test file inside static/tests/ named web_widget_markdown_tests
Basics of a test file:
odoo.define('web_widget_markdown_tests', function (require) {
    "use strict";
    var FormView = require('web.FormView');
    var testUtils = require('web.test_utils');

    QUnit.module('Markdown Widget Tests', {}, function () {
        QUnit.only('Test something', async function(assert) {
            assert.expect(1); // number of assertion we have in this
            assert.strictEqual(1, true);
        })
    })
 })
Explanation:
We pull 2 modules that we will need:
FormViewwill allow us to define a "fake" (mock) view that will hold our fields and one field with our widget applied to ittestUtilsis used to simulate actions and other useful things using it like thattestUtils.form.clickEdit(form)to go into Edit mode.
The whole suite of tests is defined by Qunit.module('Name of my suite', {}, function () {});. The first argument is the name of the suite, second is options that we will use later to pass mock data usable by all the test functions. The third argument is the function that will contain all our individual tests.
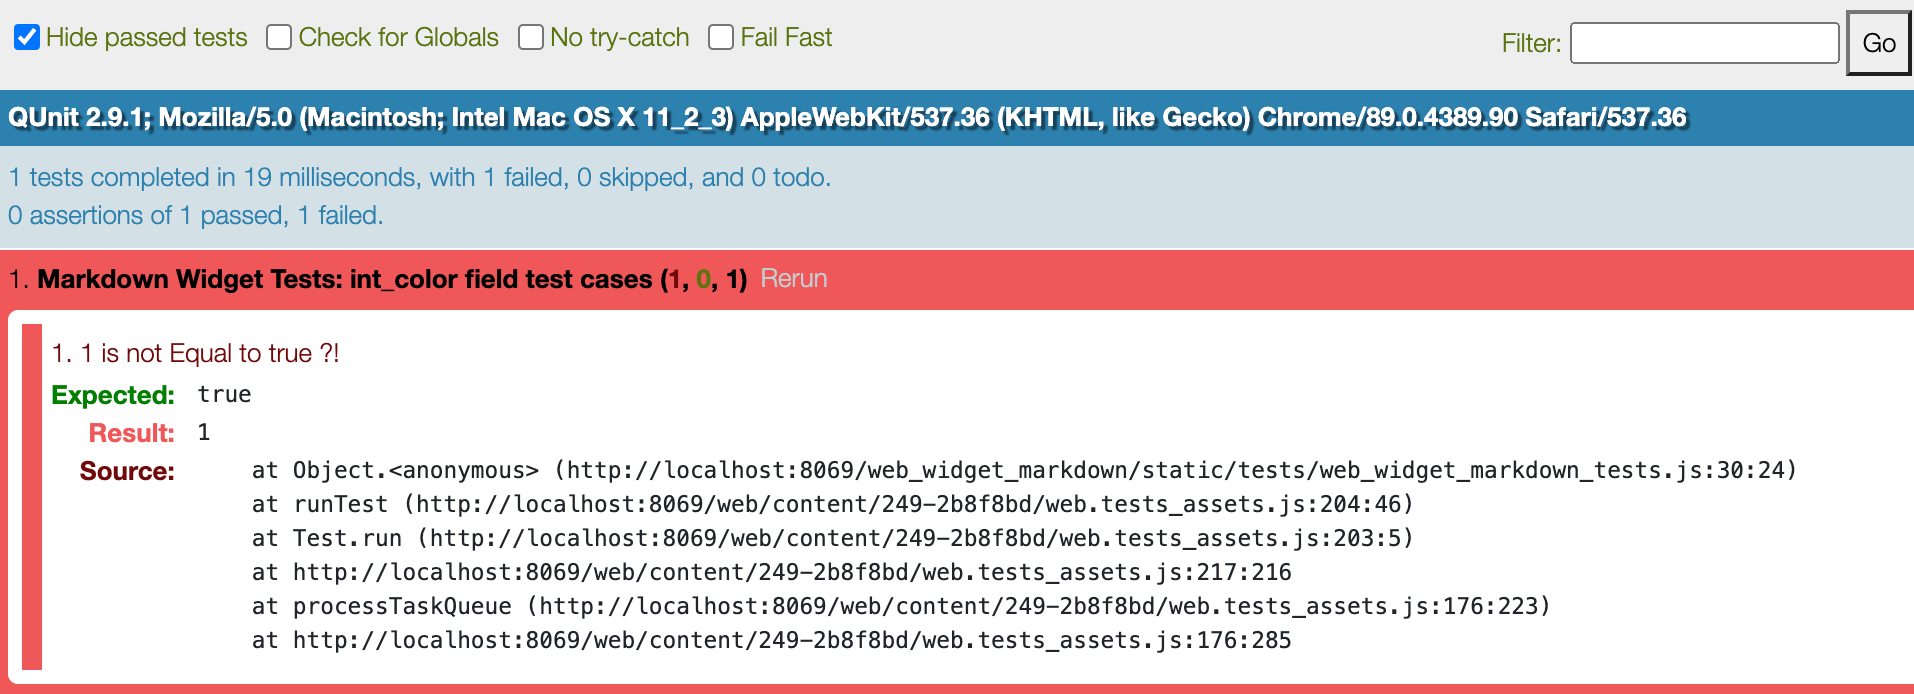
A single test is defined by QUnit.test('Test something', async function(assert) {}). Note that we wrote Qunit.only(... to run only that test. If you write QUnit.test and go to /web/tests you will see that it will run all the tests.
QUnit.test( instead of QUnit.only( or else, tests written by other modules will never be executed
Running test
After installing your module with only these 2 files (the XML and the basic JS test), open your browser at http://localhost:8069/web/tests/ and should see:

Writing better tests
Okay, now that everything is working fine we will create better tests:
QUnit.module('Markdown Widget Tests', {
    beforeEach: function () {
        this.data = {
            blog: {
                fields: {
                    name: {
                        string: "Name",
                        type: "char"
                    },
                    content: {
                        string: "Content",
                        type: "text"
                    },
                },
                records: [
                    {
                        id: 1, name: "Blog Post 1",
                        content: "# Hello world",
                    }
                ]
            }
        };
    }},
    function () {
        QUnit.only('web_widget_markdown test suite', async function(assert) {
            assert.expect(2);
            var form = await testUtils.createView({
                View: FormView,
                model: 'blog',
                data: this.data,
                arch: '<form string="Blog">' +
                        '<group>' +
                            '<field name="name"/>' +
                            '<field name="content" widget="markdown"/>' +
                        '</group>' +
                    '</form>',
                res_id: 1,
            });
            assert.strictEqual(
                form.$('.o_field_markdown').find("h1").length,
                1,
                "h1 should be present"
            );
            assert.strictEqual(
                form.$('.o_field_markdown h1').text(),
                "Hello world",
                "<h1> should contain 'Hello world'"
            );
            form.destroy();
        });
    }
);
SetUp in beforeEach
As the second argument of the QUnit.module() call we run some test set-up inside which we create some mock data that represent a basic blog post and assigning it to this.data, it will be run before each test and available inside each function.
Creating a mock FormView
With, we create a fake FormView using the data we defined in the setUp beforeEach. The structure of the form is very basic but the important part is that we apply the widget "markdown" on the field content
<field name="content" widget="markdown"/>Creating the widget to make our tests pass
The next logical step is to create the actual widget and making it pass our basic test suite.
Including external JavaScript library - SimpleMDE
To pass our tests to green we need to actually create the widget. But before that, we will pull the simpleMDE library inside our module folder
mkdir web_widget_markdown/static/lib && cd web_widget_markdown/static/lib
wget https://raw.githubusercontent.com/sparksuite/simplemde-markdown-editor/master/dist/simplemde.min.js .
https://raw.githubusercontent.com/sparksuite/simplemde-markdown-editor/master/dist/simplemde.min.css .
We include these files inside views/templates.xml by inheriting web.assets_backend to place our external library inside. web.assets_backend contains all the JavaScript and CSS/SCSS file inclusions that are used by the WebClient.
<template id="assets_backend" inherit_id="web.assets_backend">
        <xpath expr="." position="inside">
            <link rel="stylesheet" href="/web_widget_markdown/static/lib/simplemde.min.css"/>
            <script src="/web_widget_markdown/static/lib/simplemde.min.js"></script>
        </xpath>
    </template>
Defining our Odoo widget
Now is the time to create our Odoo Widget. The widgets are defined with a JavaScript file and a specific syntax (more on that later). Widgets can have an external template in an XML file when their render and edit structures are more sophisticated. We will create a template later in this tutorial for our widget.
The Javascript File
For the JavaScript side, we go inside static/src/js/ and will create a file named field_widget.js with the minimal content to make our test pass:
odoo.define('web_widget_markdown', function (require) {
"use strict";
var fieldRegistry = require('web.field_registry');
var basicFields = require('web.basic_fields');


var markdownField = basicFields.FieldText.extend({
    supportedFieldTypes: ['text'],
    className: 'o_field_markdown',

    _renderReadonly: function () {
        this.$el.html("<h1>Hello world</h1>");
    },
});

fieldRegistry.add('markdown', markdownField);

return {
    markdownField: markdownField,
};
});
And don't forget to add it to our views/templates.xml file inside the assets_backend template definition, after the inclusion of the simpleMDE external library:
<script src="/web_widget_markdown/static/src/js/field_widget.js" type="text/javascript" />Explanation of the widget content
First of all, a widget file is defined inside odoo.define(). We import the necessary module; most of them are in the core Odoo web addon folder.
The newly created Field has to be registered by Odoo with fieldRegistry.add('markdown', markdownField);
and then exported by returning it return {markdownField: markdownField,}
For this very example, to pass the tests, the markdownField is a JavaScript object that extends (heritage in Odoo JS Framework) the basic FieldText (that inherit InputField). Our objective is to have the standard behavior of a text field (used for Text) and override the _renderReadonly method to display something different than the value.
The Odoo FieldText transforms the Dom node of your widget into a <textarea> in edit mode. We can see it in odoo/addons/web/static/src/js/fields/basic_fields.js
init: function () {
    this._super.apply(this, arguments);

    if (this.mode === 'edit') {
        this.tagName = 'textarea';
    }
    this.autoResizeOptions = {parent: this};
},
This behavior is the closest to our expected result so we are inheriting that widget to gain time.
In our widget, we defined the className property to add our class .o_field_markdown to identify our widget in the DOM. Also, it is used in our tests to check widget behavior.
The $el property of a widget
$el property accessible inside the Widget holds the JQuery object of the root DOM element of the widget. So in this case we use the JQuery HTML function to inject the content <h1>Hello World</h1> inside the $el to pass this test. In TDD the workflow is to make the tests pass with minimum effort, then write new tests, refactor to make it pass again, etc...
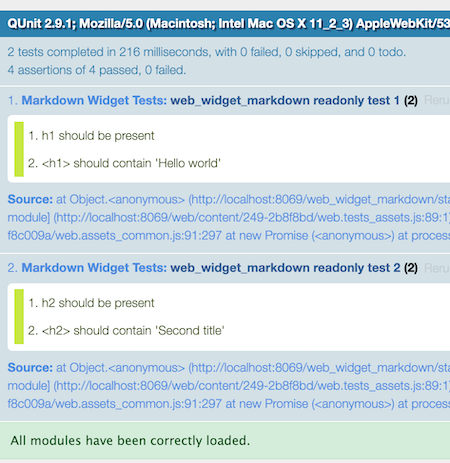
After updating the module and going to http://localhost:8069/web/tests/ we can see that our tests pass!
Improving our tests and refactoring the widget
Adding more tests
We will add another test to make our test suite slightly more robust and see if our current implementation of the widget still holds up (Spoiler alert: it won't).
QUnit.test('web_widget_markdown readonly test 2', async function(assert) {
    assert.expect(2);
    var form = await testUtils.createView({
        View: FormView,
        model: 'blog',
        data: this.data,
        arch: '<form string="Blog">' +
                '<group>' +
                    '<field name="name"/>' +
                    '<field name="content" widget="markdown"/>' +
                '</group>' +
            '</form>',
        res_id: 2,
    });
    assert.strictEqual(
        form.$('.o_field_markdown').find("h2").length,
        1,
        "h2 should be present"
    )
    assert.strictEqual(
        form.$('.o_field_markdown h2').text(),
        "Second title",
        "<h2> should contain 'Second title'"
    )
    form.destroy();
});
We changed "QUnit.only" to "QUnit.test" to run multiple tests and then in the test interface we searched for the "Markdown Widget" module to run only them:

Now the tests are failing because we are always injecting <h1>Hello world</h1 as the value!
Refactoring the widget
The value property
Every widget inheriting InputField, DebouncedField or even AbstractField hold their value inside a value property. So inside the _renderReadonly method, we use the same logic as before, injecting directly the HTML content inside the $el. But this time we will use the underlying markdown function of the SimpleMDE library to parse this.value and return the HTML transformed version.
This is the new field_widget.js
odoo.define('my_field_widget', function (require) {
"use strict";
var fieldRegistry = require('web.field_registry');
var basicFields = require('web.basic_fields');


var markdownField = basicFields.FieldText.extend({
    supportedFieldTypes: ['text'],
    className: 'o_field_markdown',
    jsLibs: [
        '/web_widget_markdown/static/lib/simplemde.min.js',
    ],

    _renderReadonly: function () {
        this.$el.html(SimpleMDE.prototype.markdown(this.value));
    },
});

fieldRegistry.add('markdown', markdownField);

return {
    markdownField: markdownField,
};
});
We added the external JavaScript library SimpleMDE in the jsLibs definition of our widget.
Running the tests again now gives us :

Victory! ?
Simulating Edit mode in our test suite
The current use case of our widget will be, going into Edit mode, writing markdown, Saving, and then seeing it rendered as HTML.
This what we will simulate in this new test function by using some of the most useful functions in the testUtils module.
QUnit.test('web_widget_markdown edit form', async function(assert) {
    assert.expect(2);
    var form = await testUtils.createView({
        View: FormView,
        model: 'blog',
        data: this.data,
        arch: '<form string="Blog">' +
                '<group>' +
                    '<field name="name"/>' +
                    '<field name="content" widget="markdown"/>' +
                '</group>' +
            '</form>',
        res_id: 1,
    });
    await testUtils.form.clickEdit(form);
    await testUtils.fields.editInput(form.$('.o_field_markdown'), '**bold content**');
    await testUtils.form.clickSave(form);
    assert.strictEqual(
        form.$('.o_field_markdown').find("strong").length,
        1,
        "b should be present"
    )
    assert.strictEqual(
        form.$('.o_field_markdown strong').text(),
        "bold content",
        "<strong> should contain 'bold content'"
    )
    form.destroy();
});
What is happening inside the test?
We create the mock form similar to the other 2 tests. Then we simulate the click on Edit button with clickEdit. After that, we edit the input with editInput and write some markdown that we will test after. Finally, we simulate the user hitting the Save button via clickSave .
Odoo versions compatibility
clickEdit and clickSave are new functions in the file odoo/addons/web/static/tests/helpers/test_utils_form.js present from Odoo 12 and onwards.
If you use Odoo 11, replace these calls with that
// instead of await testUtils.form.clickEdit(form);
form.$buttons.find(".o_form_button_edit").click();

// intead of await testUtils.form.clickSave(form);
form.$buttons.find(".o_form_button_save").click();
Run the tests again on your browser and you will see that it passes! ?
Conclusion
This is already running quite long and for now, our widget is functional in render and edit mode. In the next part, we will add the Markdown Editor itself instead of the <textarea> tag to make it easier for the user to write.
We will view more types of Fields, create a template and change our tests to take into consideration the change of input type.
The code for this Part 1 of the tutorial is available here on Github.


