In this tutorial, we will see how to set up your macOS for Odoo 14 development.
Homebrew
Homebrew is a package manager for macOS, the most popular one. We will use it to install most of the other required tools. But first, an important dependency for Homebrew is the Command Line Developer Tools for Xcode (It includes compilers that will allow our machine to build the library from sources). From your terminal run this command
xcode-select --installDepending on your OS version you may need to open Xcode itself one time first and accept some User Licences Agreements.
Then for Homebrew itself, referring to what's written on the homepage :
/bin/bash -c "$(curl -fsSL https://raw.githubusercontent.com/Homebrew/install/HEAD/install.sh)"You will be asked for your password, to make sure everything works, run brew doctor, it will inform you, and fix problems with packages that lost their links and conflicts between shared dependencies.
Git
macOS already comes with Git but as is with python and other libraries it's better to leave the system ones alone and have our own versions that we can upgrade. Se we are using homebrew to install it:
brew install gitPostgreSQL
We are going to install the latest PostgreSQL via Homebrew
brew install postgresql
If you want to install specific versions you can, for example:
brew install [email protected]For Odoo 14.0 postgresql version must be > 10.0
After install, PostgreSQL will be available as a homebrew service, you can start the service with the command:
brew services start postgresql
PostgreSQL is automatically configured to be restarted when you log on to your computer next time
If you had older PostgreSQL versions installed with brew and upgraded, you need to also upgrade the databases with:
brew postgresql-upgrade-database
NodeJS
For Odoo we will also need multiple versions of NodeJS, the main library used by Odoo is Less with the old versions. And the command line arguments changed, for example, Odoo 10 trying to launch the command less with its arguments may result in an error because the package installed with npm (Node Package Manager) is too recent.
To avoid future problems we are using nvm, allowing us to have multiple node NodeJs versions on our machine
Install nvm by copy-pasting the install script command into your terminal.
To list the stable versions of NodeJs :
nvm ls-remote --lts
For this tutorial we are choosing this version:
nvm install v10.24.0To switch between versions shown in nvm list:
nvm use default
nvm use v10.24.0
You can change the default version with :
nvm alias default 10.24.0
Python
As Python developers, working with Odoo may lead us to work with python 2.7 (Odoo 8, 9, 10) or python 3.x for the more recent versions of Odoo (11, 12, 13, 14). To make our life easier and not mess with the python shipped with the macOS system we will install pyenv
Pyenv
brew install pyenvTo correctly add Pyenv to your path copy the following commands:
echo -e $'if command -v pyenv 1>/dev/null 2>&1; then\\n export PYENV_ROOT="$HOME/.pyenv"\\n export PATH="$PYENV_ROOT/bin:$PATH"\\n eval "$(pyenv init --path)"\\n eval "$(pyenv init -)"\\nfi' >> ~/.zshrcPyenv advises us to install more dependencies before installing python:
brew install openssl readline sqlite3 xz zlibFinally, we can install python.
First, we are going to check what versions are available, we are interested in the latest 3.9:to run pyenv install If we want to install python 3.9 for example we can type pyenv install 3.9 and the shell will correct us by showing us the full version name available
▶ pyenv install --list | grep 3.9
  3.9.0
  3.9-dev
  3.9.1
  3.9.2
  miniconda-3.9.1
  miniconda3-3.9.1
  miniconda3-3.9-4.9.2
If the version you need is missing, try upgrading pyenv:
brew update && brew upgrade pyenvWith this example, we are installing 3.9.2:
pyenv install 3.9.2You may run into errors at this point, for multiples reasons but an example may be that you already installed Xcode command line tools in the past but upgraded your macOS version. You may encounter a message like that:
configure: error: C compiler cannot create executables
See `config.log' for more details
xcrun: error: invalid active developer path (/Library/Developer/CommandLineTools), missing xcrun at: /Library/Developer/CommandLineTools/usr/bin/xcrun
Run again xcode-select --install
If everything went okay you should see:
Installed Python-3.9.2 to /Users/odootuts/.pyenv/versions/3.9.2Repeat the process for every other python you want to install. (If you are working with Odoo < v.11 run pyenv install 2.7.18
To see the list of pythons installed in your environment :
pyenv versionsVirtualenvs
virtualenvs allow you to create isolated environments for each project you are working on. Packages installed via pip will be unique to these environments and this is especially important if you are going to work on multiple versions of Odoo!
You can use and install virtualenv directly but since we installed pyenv, we are going to use the virtualenv plugin of pyenv to make the whole process less painful to manage.
brew install pyenv-virtualenv
After the installation we have to add another line to our .bash_profile or .zshrc file:
if which pyenv-virtualenv-init > /dev/null; then eval "$(pyenv virtualenv-init -)"; fi Don't forget to source your file to reload your config with source ~/.zshrc or source ~/.bash_profile
Now we will create our virtual env for Odoo 14 using Python 3.9.2 that we installed before:
pyenv virtualenv 3.9.2 odoo-14-envTo activate the environment:
pyenv activate odoo-14-env
To ease of use we are going to create the folder that will host Odoo 14 and auto-activate the environment with these commands:
mkdir Odoo-14-codingdodo & cd Odoo-14-codingdodo
pyenv local odoo-14-env
Now, every time we cd into that project folder we will be in the correct environment.
Odoo
We begin by cloning the correct branch into our project folder
cd Odoo-14-tuts
git clone -b 14.0 --single-branch --depth 1 https://github.com/odoo/odoo.git
Next, we install the requirements in the newly created folder
cd odoo
pip install --upgrade pip
pip install setuptools wheel
pip install -r requirements.txt -e .
If you run into problems installing psycopg, consider the following :
brew install opensslIf it's not enough use pip install with exporting LDFLAGS :
env LDFLAGS='-L/usr/local/lib -L/usr/local/opt/openssl/lib
-L/usr/local/opt/readline/lib' pip install -r requirements.txt -e .
Now it's time to launch odoo, from your project directory :
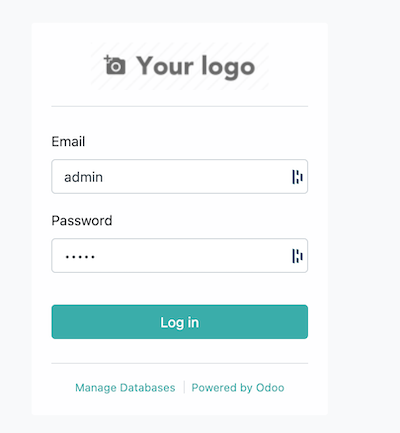
./odoo/odoo-bin --addons-path=odoo/addons -d odoo_codingdodo --save --config=.odoorc_codingdodoThis will create and initialize a database called "odoo_tuts_install". (If the database is already created, add -i base to install base modules and initialize it) we are not using a configuration file, for now, we are just testing basic install and http://localhost:8069/ should show you:

admin/admin are the credentials and logging in should take you to Odoo 14 web client.
We used the --save or -s flag we added when firing up, meaning the configuration file will be created and saved. The --config or -c flag are used to specify a configuration file, in our case, it will create a file named .odoorc_codingdodo in the Project Directory. If you omit the config flag, the default file will be named .odoorc and will be placed in your user home.
▶ cat .odoorc_codingdodo
[options]
addons_path = /Users/codingdodo/Code/Odoo-14-codingdodo/odoo/addons
admin_passwd = admin
csv_internal_sep = ,
data_dir = /Users/codingdodo/Library/Application Support/Odoo
db_host = False
db_maxconn = 64
db_name = odoo_codingdodo
...
Feel free to modify the config file to suit your needs, but for dev purpose it is sufficient.
Initialize a custom Addons folder.
We will now quickly set up a custom addons folder and create our first module, from the Project Directory with the scaffold command:
./odoo/odoo-bin scaffold codingdodo_addons/module_nameThis will create the directory codingdodo_addons and create a module module_name inside it with the correct folder structure and minimal info.
To take our custom addons path into consideration, either edit directly the config file or use the save command to save the new modifications:
./odoo/odoo-bin --addons-path=odoo/addons,codingdodo_addons -d odoo_codingdodo --save --config=.odoorc_codingdodoThis will add our custom addons path to the config file.
What's next
Thank you for following this guide, now that your dev machine is set up you may be interested in these code tutorials:
- OWL in Odoo 14 - How to extend and patch existing OWL Components.
- Create an Odoo 14 Markdown Widget Field with TDD - Part 1
- RealWorld App with OWL (Odoo Web Library) - Part 1


