

In this second part about Odoo 14 JavaScript basics, we will now review how to create a new View from scratch with OWL. It's very important that you understood clearly the concepts seen in part 1 of this tutorial because we will not explain each MVC Components that we will create here.
What are we building?
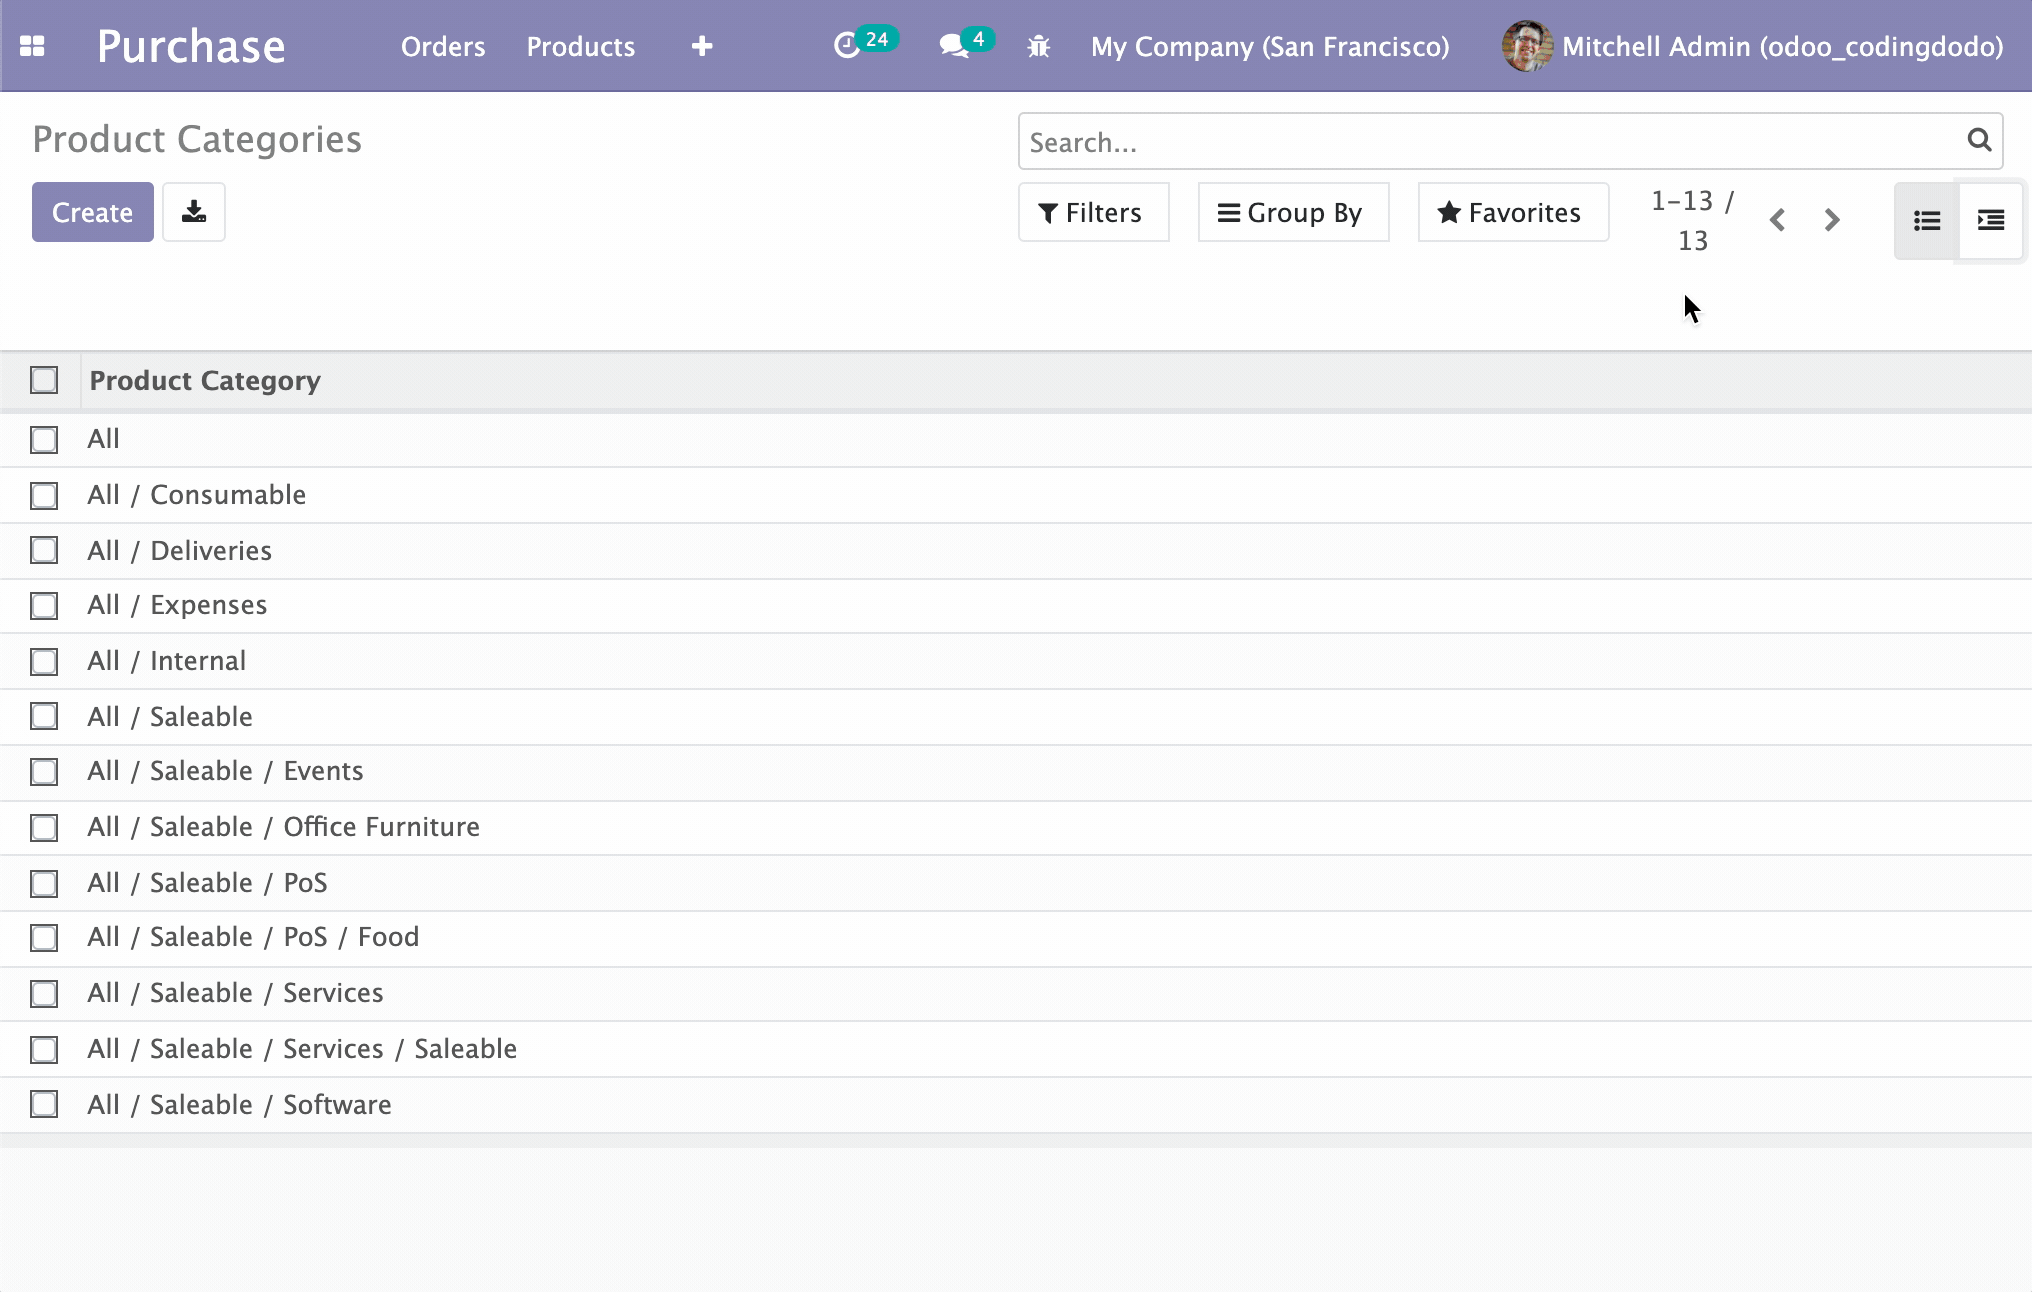
We will create a new type of view that will display parent/child models types in a hierarchical, interactive manner. I have to be honest I'm not a big fan of the way Odoo displays the Product Categories, I would prefer to see them in a hierarchical tree so this is exactly what we are building.
The source code for this part of the tutorial is available here and you can clone directly that branch:
git clone -b basic-rendering-component https://github.com/Coding-Dodo/owl_tutorial_views.gitOr, better you can follow along with this tutorial, create and modify files one by one as we go.
Overview of the Module architecture
This is the file architecture of our new module.
├── LICENSE
├── README.md
├── README.rst
├── __init__.py
├── __manifest__.py
├── models
│   ├── __init__.py
│   └── ir_ui_view.py
├── static
│   ├── description
│   │   └── icon.png
│   └── src
│       ├── components
│       │   └── tree_item
│       │       ├── TreeItem.js
│       │       ├── TreeItem.xml
│       │       └── tree_item.scss
│       ├── owl_tree_view
│       │   ├── owl_tree_controller.js
│       │   ├── owl_tree_model.js
│       │   ├── owl_tree_renderer.js
│       │   ├── owl_tree_view.js
│       │   └── owl_tree_view.scss
│       └── xml
│           └── owl_tree_view.xml
└── views
    └── assets.xml
From that typical Odoo structure, we can note that:
- All our JS logic lives in the /static/src folder
- OWL Components live inside the
componentsfolder and each component has its own folder to host the JS File (Actual OWL Component), the XML template, and the styling in the SCSS file. - The actual Odoo View is inside the
owl_tree_viewfolder and is split into 4 files for the 4 parts: the Model, the Renderer, the Controller, and the View.
Registering a new view type in the ir.ui.view Model.
First, let's take the python out of the way, we will register a new View type on the ir.ui.view Model. So let's create a file in the models folder called ir_ui_view.py with this content:
from odoo import fields, models


class View(models.Model):
    _inherit = "ir.ui.view"

    type = fields.Selection(selection_add=[("owl_tree", "OWL Tree Vizualisation")])
We expand the Selection Field called type with a new tuple of values. Our type of view will be called "owl_tree", feel free to choose anything you'd like, but try to stay descriptive and simple. Don't forget to add and update your __init__.py files inside the models' folder and the root folder.
Adding the assets to the assets_backend view
Even if the JavaScript files are not created yet, let's call them inside the assets_backend view that we will be extending.
Create a assets.xml file inside the views folder of the module with that content:
<?xml version="1.0" encoding="utf-8"?>
<odoo>
    <template id="assets_backend" name="assets_backend" inherit_id="web.assets_backend">
        <xpath expr="." position="inside">
            <script type="text/javascript" src="/owl_tutorial_views/static/src/components/tree_item/TreeItem.js"></script>

            <script type="text/javascript" src="/owl_tutorial_views/static/src/owl_tree_view/owl_tree_view.js"></script>
            <script type="text/javascript" src="/owl_tutorial_views/static/src/owl_tree_view/owl_tree_model.js"></script>
            <script type="text/javascript" src="/owl_tutorial_views/static/src/owl_tree_view/owl_tree_controller.js"></script>
            <script type="text/javascript" src="/owl_tutorial_views/static/src/owl_tree_view/owl_tree_renderer.js"></script>
        </xpath>
        <xpath expr="link[last()]" position="after">
            <link rel="stylesheet" type="text/scss" href="/owl_tutorial_views/static/src/components/tree_item/tree_item.scss"/>
            <link rel="stylesheet" type="text/scss" href="/owl_tutorial_views/static/src/owl_tree_view/owl_tree_view.scss"/>
        </xpath>
    </template>
</odoo>
We added the JavaScript file with the XPath expression "." (root) and the SCSS files are added via the XPath expression link[last()] meaning that we will search for other <link rel="stylesheet" src="..."/> declaration and place ours after the last one.
For the XML Qweb templates for the OWL Components and the OWL Renderer, we need to add them inside the __manifest__.py of our module:
{
    "name": "Coding Dodo - OWL Tutorial Views",
    "summary": "Tutorial about Creating an OWL View from scratch.",
    "author": "Coding Dodo",
    "website": "https://codingdodo.com",
    "category": "Tools",
    "version": "14.0.1",
    "depends": ["base", "web", "mail", "product"],
    "qweb": [
        "static/src/components/tree_item/TreeItem.xml",
        "static/src/xml/owl_tree_view.xml",
    ],
    "data": [
        "views/assets.xml",
        "views/product_views.xml",
    ],
}
You can see that we inherited the product module and also added product_views.xml. This is not necessary, it will only help us see our module in action:
<?xml version="1.0" encoding="utf-8"?>
<odoo>

    <record id="product_category_view_owl_tree_view" model="ir.ui.view">
        <field name="name">Product Categories</field>
        <field name="model">product.category</field>
        <field name="arch" type="xml">
            <owl_tree></owl_tree>
        </field>
    </record>

    <record id='product.product_category_action_form' model='ir.actions.act_window'>
        <field name="name">Product Categories</field>
        <field name="res_model">product.category</field>
        <field name="view_mode">tree,owl_tree,form</field>
    </record>

</odoo>This is a typical example of how you will be able to call our new View type on any model. Notice that the <owl_tree></owl_tree> tag corresponds to the newly added type on ir.ui.view Model. You have to:
- Update the
ir.actions.act_windowto include your newly created "view mode" inside the tag<field name="view_mode">. - Create the actual
ir.ui.viewcalling your View in its XML arch.
Creating the View, Model, Controller and, Renderer.
Begin by creating a folder that will hold the 4 elements of our view and an XML folder to hold the QWeb Templates, inside the root folder src:
├── owl_tree_view
│   ├── owl_tree_controller.js
│   ├── owl_tree_model.js
│   ├── owl_tree_renderer.js
│   ├── owl_tree_view.js
│   └── owl_tree_view.scss
└── xml
└── owl_tree_view.xmlThe Controller
Inside the file owl_tree_controller.js we will create our OWLTreeController that extends AbastractController that we saw in part 1 of the Tutorial:
odoo.define("owl_tutorial_views.OWLTreeController", function (require) {
  "use strict";

  var AbstractController = require("web.AbstractController");

  var OWLTreeController = AbstractController.extend({
    custom_events: _.extend({}, AbstractController.prototype.custom_events, {}),

    /**
     * @override
     * @param parent
     * @param model
     * @param renderer
     * @param {Object} params
     */
    init: function (parent, model, renderer, params) {
      this._super.apply(this, arguments);
    }
  });

  return OWLTreeController;
});
For now, this Controller does nothing really, init just calls the parent function and no custom_events are created for now, but we will get to it later.
The Model
Inside the file owl_tree_model.js, we will create our OWLTreeModel, which will make the call to the server.
The model inherits the AbstractModel Class and will implement the basic essential functions to make our view works:
- The
__loadfunction (called the first time) will fetch data from the server. - The
__reloadfunction called by the Controller when any change in the state of the UI occurs. This will also fetch data from the server. - The
__getfunction to give data back to the Controller and be passed to our OWL Renderer.
odoo.define("owl_tutorial_views.OWLTreeModel", function (require) {
  "use strict";

  var AbstractModel = require("web.AbstractModel");

  const OWLTreeModel = AbstractModel.extend({

    __get: function () {
      return this.data;
    },

    __load: function (params) {
      this.modelName = params.modelName;
      this.domain = [["parent_id", "=", false]];
      // this.domain = params.domain;
      // It is the better to get domains from params
      // but we will evolve our module later.
      this.data = {};
      return this._fetchData();
    },

    __reload: function (handle, params) {
      if ("domain" in params) {
        this.domain = params.domain;
      }
      return this._fetchData();
    },

    _fetchData: function () {
      var self = this;
      return this._rpc({
        model: this.modelName,
        method: "search_read",
        kwargs: {
          domain: this.domain,
        },
      }).then(function (result) {
        self.data.items = result;
      });
    },
  });

  return OWLTreeModel;
});
Since we want to make RPC calls in the load and the reload function we decided to extract that logic to a fetchData function that will do the actual rpc call.
The params argument of the load and reload functions contains a lot of info, notably the domain that we could use. But we have to be careful because without enough logic it could break our code. We will keep it simple right now, the view needs to show the Root category and then show the child under so the domain is set explicitly to [["parent_id", "=", false]] for now.
Notice that we store the result of that server request to data.items. This is important because later you will see that the OWL Renderer gets access to multiple data via props that get merged into a big JS Object. So it will make our life easier later to directly store the result of the RPC call into the item key of the data.
The OWL Renderer
Now we will create our first OWL Component, the Renderer of our view inside the file owl_tree_renderer.js. It will not extend the usual Component but the AbstractRendererOwl Component instead.
odoo.define("owl_tutorial_views.OWLTreeRenderer", function (require) {
  "use strict";

  const AbstractRendererOwl = require("web.AbstractRendererOwl");
  const patchMixin = require("web.patchMixin");
  const QWeb = require("web.QWeb");
  const session = require("web.session");

  const { useState } = owl.hooks;

  class OWLTreeRenderer extends AbstractRendererOwl {
    constructor(parent, props) {
      super(...arguments);
      this.qweb = new QWeb(this.env.isDebug(), { _s: session.origin });
      this.state = useState({
        localItems: props.items || [],
      });
    }

    willUpdateProps(nextProps) {
      Object.assign(this.state, {
        localItems: nextProps.items,
      });
    }
  }

  const components = {
    TreeItem: require("owl_tutorial_views/static/src/components/tree_item/TreeItem.js"),
  };
  Object.assign(OWLTreeRenderer, {
    components,
    defaultProps: {
      items: [],
    },
    props: {
      arch: {
        type: Object,
        optional: true,
      },
      items: {
        type: Array,
      },
      isEmbedded: {
        type: Boolean,
        optional: true,
      },
      noContentHelp: {
        type: String,
        optional: true,
      },
    },
    template: "owl_tutorial_views.OWLTreeRenderer",
  });

  return patchMixin(OWLTreeRenderer);
});
This Renderer will be instantiated with props that will contain the items fetched from the server by the Model. The other props passed and present are examples of what can be passed.
In our Component, we declare a local state via the useState hook that contains a "local version" of the items. This is not necessary in that situation but this is an example to show you that your Renderer can have a local state copied from the props and then independent!
Inside the willUpdateProps function, we update the localItems with the new value of items fetched from the server. The willUpdateProps function will be called by the Controller every time the UI change or new data has been loaded from the server.
willUpdateProps is the key piece of reactivity that will make our OWL View react to different elements of the UI like the Control Panel, the reload button, etc...
The QWeb Template for the renderer
Inside /src/xml we create the OWL Template for the renderer, the file will be called owl_tree_view.xml:
<?xml version="1.0" encoding="UTF-8"?>
<templates xml:space="preserve">

    <div t-name="owl_tutorial_views.OWLTreeRenderer" class="o_owl_tree_view" owl="1">
        <div class="d-flex p-2 flex-row owl-tree-root">
            <div class="list-group">
                <t t-foreach="props.items" t-as="item">
                    <TreeItem item="item"/>
                </t>
            </div>
        </div>
    </div>

</templates>
This is a basic template with a foreach loop on the items, here you can see that we use a custom TreeItem OWL Component that we will create later.
The View
Finally, we will create the View that extends the AbstractView. It will be responsible for instantiating and connecting the Model, Renderer, and Controller.
Create the file owl_tree_view.js with that content:
odoo.define("owl_tutorial_views.OWLTreeView", function (require) {
  "use strict";

  // Pulling the MVC parts
  const OWLTreeController = require("owl_tutorial_views.OWLTreeController");
  const OWLTreeModel = require("owl_tutorial_views.OWLTreeModel");
  const OWLTreeRenderer = require("owl_tutorial_views.OWLTreeRenderer");
  const AbstractView = require("web.AbstractView");
  const core = require("web.core");
  // Our Renderer is an OWL Component so this is needed
  const RendererWrapper = require("web.RendererWrapper");
  const view_registry = require("web.view_registry");

  const _lt = core._lt;

  const OWLTreeView = AbstractView.extend({
    accesskey: "m",
    display_name: _lt("OWLTreeView"),
    icon: "fa-indent",
    config: _.extend({}, AbstractView.prototype.config, {
      Controller: OWLTreeController,
      Model: OWLTreeModel,
      Renderer: OWLTreeRenderer,
    }),
    viewType: "owl_tree",
    searchMenuTypes: ["filter", "favorite"],

    /**
     * @override
     */
    init: function () {
      this._super.apply(this, arguments);
    },

    getRenderer(parent, state) {
      state = Object.assign(state || {}, this.rendererParams);
      return new RendererWrapper(parent, this.config.Renderer, state);
    },
  });

  // Make the view of type "owl_tree" actually available and valid
  // if seen in an XML or an action.
  view_registry.add("owl_tree", OWLTreeView);

  return OWLTreeView;
});
As you can see, this is a very classic definition of a View in JavaScript Odoo. The special part is inside the getRenderer function where we will return our OWL Component wrapped with the RendererWrapper
getRenderer(parent, state) {
    state = Object.assign(state || {}, this.rendererParams);
    // this state will arrive as "props" inside the OWL Component
    return new RendererWrapper(parent, this.config.Renderer, state);
},
Notice also that, again we use the same view_type name that is owl_tree that we choose at the beginning and add it to the view registry.
Adding some CSS
In the folder of our view, create an scss file called owl_tree_view.scss with this content:
.owl-tree-root {
  width: 1200px;
  height: 1200px;
}
This will help us visualize correctly our view.
That's it for the basic structure of our view, we have all the MVC components created and will now have to handle the TreeItem component that will represent an Item (or a Category in our example on product categories).
The TreeItem OWL Component
Let's handle the TreeItem component that will represent a node in our hierarchical tree view. An item will have child_id (standard field for parent/child models) and have a children property also, containing the children in Object form.
We will create a components folder and inside that, there will be the different files for our TreeItem Component:
.
├── components
│   └── tree_item
│       ├── TreeItem.js
│       ├── TreeItem.xml
│       └── tree_item.scss
The Template
We will begin with the Template, which will indicate how we would like the information to be displayed before coding the JavaScript component. It is sometimes beneficial to code the desired end result first so our JavaScript implementation will then follow that wishful thinking.
<?xml version="1.0" encoding="UTF-8"?>
<templates xml:space="preserve">
    <t t-name="owl_tutorial_views.TreeItem" owl="1">
        <div class="tree-item-wrapper">
            <div class="list-group-item list-group-item-action d-flex justify-content-between align-items-center owl-tree-item">
                <span t-esc="props.item.display_name"/>
                <span class="badge badge-primary badge-pill" t-esc="props.item.product_count">4</span>
            </div>
            <t t-if="props.item.child_id.length > 0">
                <div class="d-flex pl-4 py-1 flex-row treeview" t-if="props.item.children and props.item.children.length > 0">
                    <div class="list-group">
                        <t t-foreach="props.item.children" t-as="child_item">
                            <TreeItem item="child_item"/>
                        </t>
                    </div>
                </div>
            </t>
        </div>
    </t>
</templates>
As you can see, this is a recursive component. If the TreeItem has child_id array set and with items, it will loop over the children and call itself:
<t t-foreach="props.item.children" t-as="child_item">
	<TreeItem item="child_item"/>
</t>
The rest of the Component template is not that interesting, it is standard bootstrap 4 classes and markup.
The TreeItem.js Component
odoo.define(
  "owl_tutorial_views/static/src/components/tree_item/TreeItem.js",
  function (require) {
    "use strict";
    const { Component } = owl;
    const patchMixin = require("web.patchMixin");

    const { useState } = owl.hooks;

    class TreeItem extends Component {
      /**
       * @override
       */
      constructor(...args) {
        super(...args);
        this.state = useState({});
      }
    }

    Object.assign(TreeItem, {
      components: { TreeItem },
      props: {
        item: {},
      },
      template: "owl_tutorial_views.TreeItem",
    });

    return patchMixin(TreeItem);
  }
);
Here also you can see that the Component is recursive because its own components are made of itself.
We declared a state here but it is not used... yet! The rest of the Component is very classic OWL Component definition in Odoo.
If you are coming from the tutorial about using OWL as a standalone modern JavaScript library you may notice some differences, like not defining static properties on the Component. This is due to the fact that from Odoo we don't have access to Babel that will transpile our ES6/ESNext JavaScript syntax to standard output. So we use Object.assign to assign the usual static properties of the component like components, template or props.
Adding the SCSS Styles
We have to create another SCSS file for that component: tree_item.scss that will contain this class style rules:
.tree-item-wrapper {
  min-width: 50em;
}
What's Next
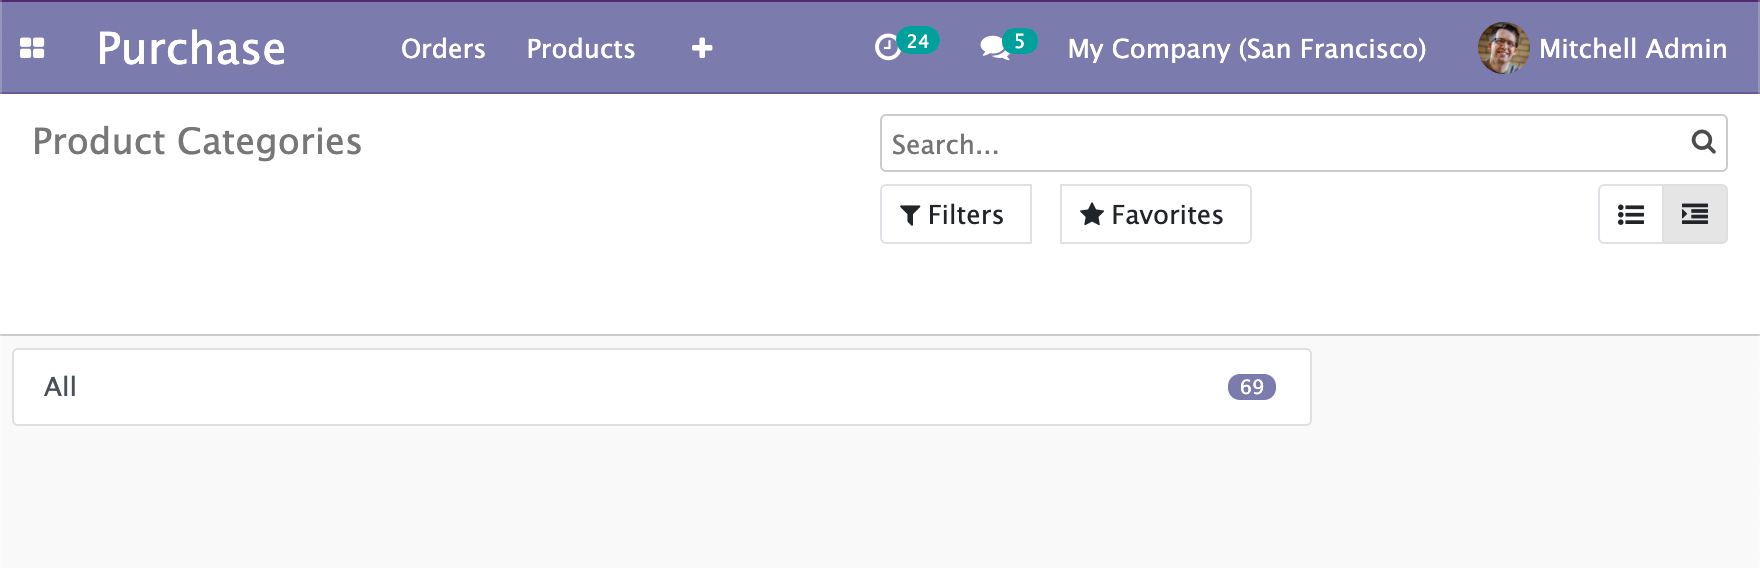
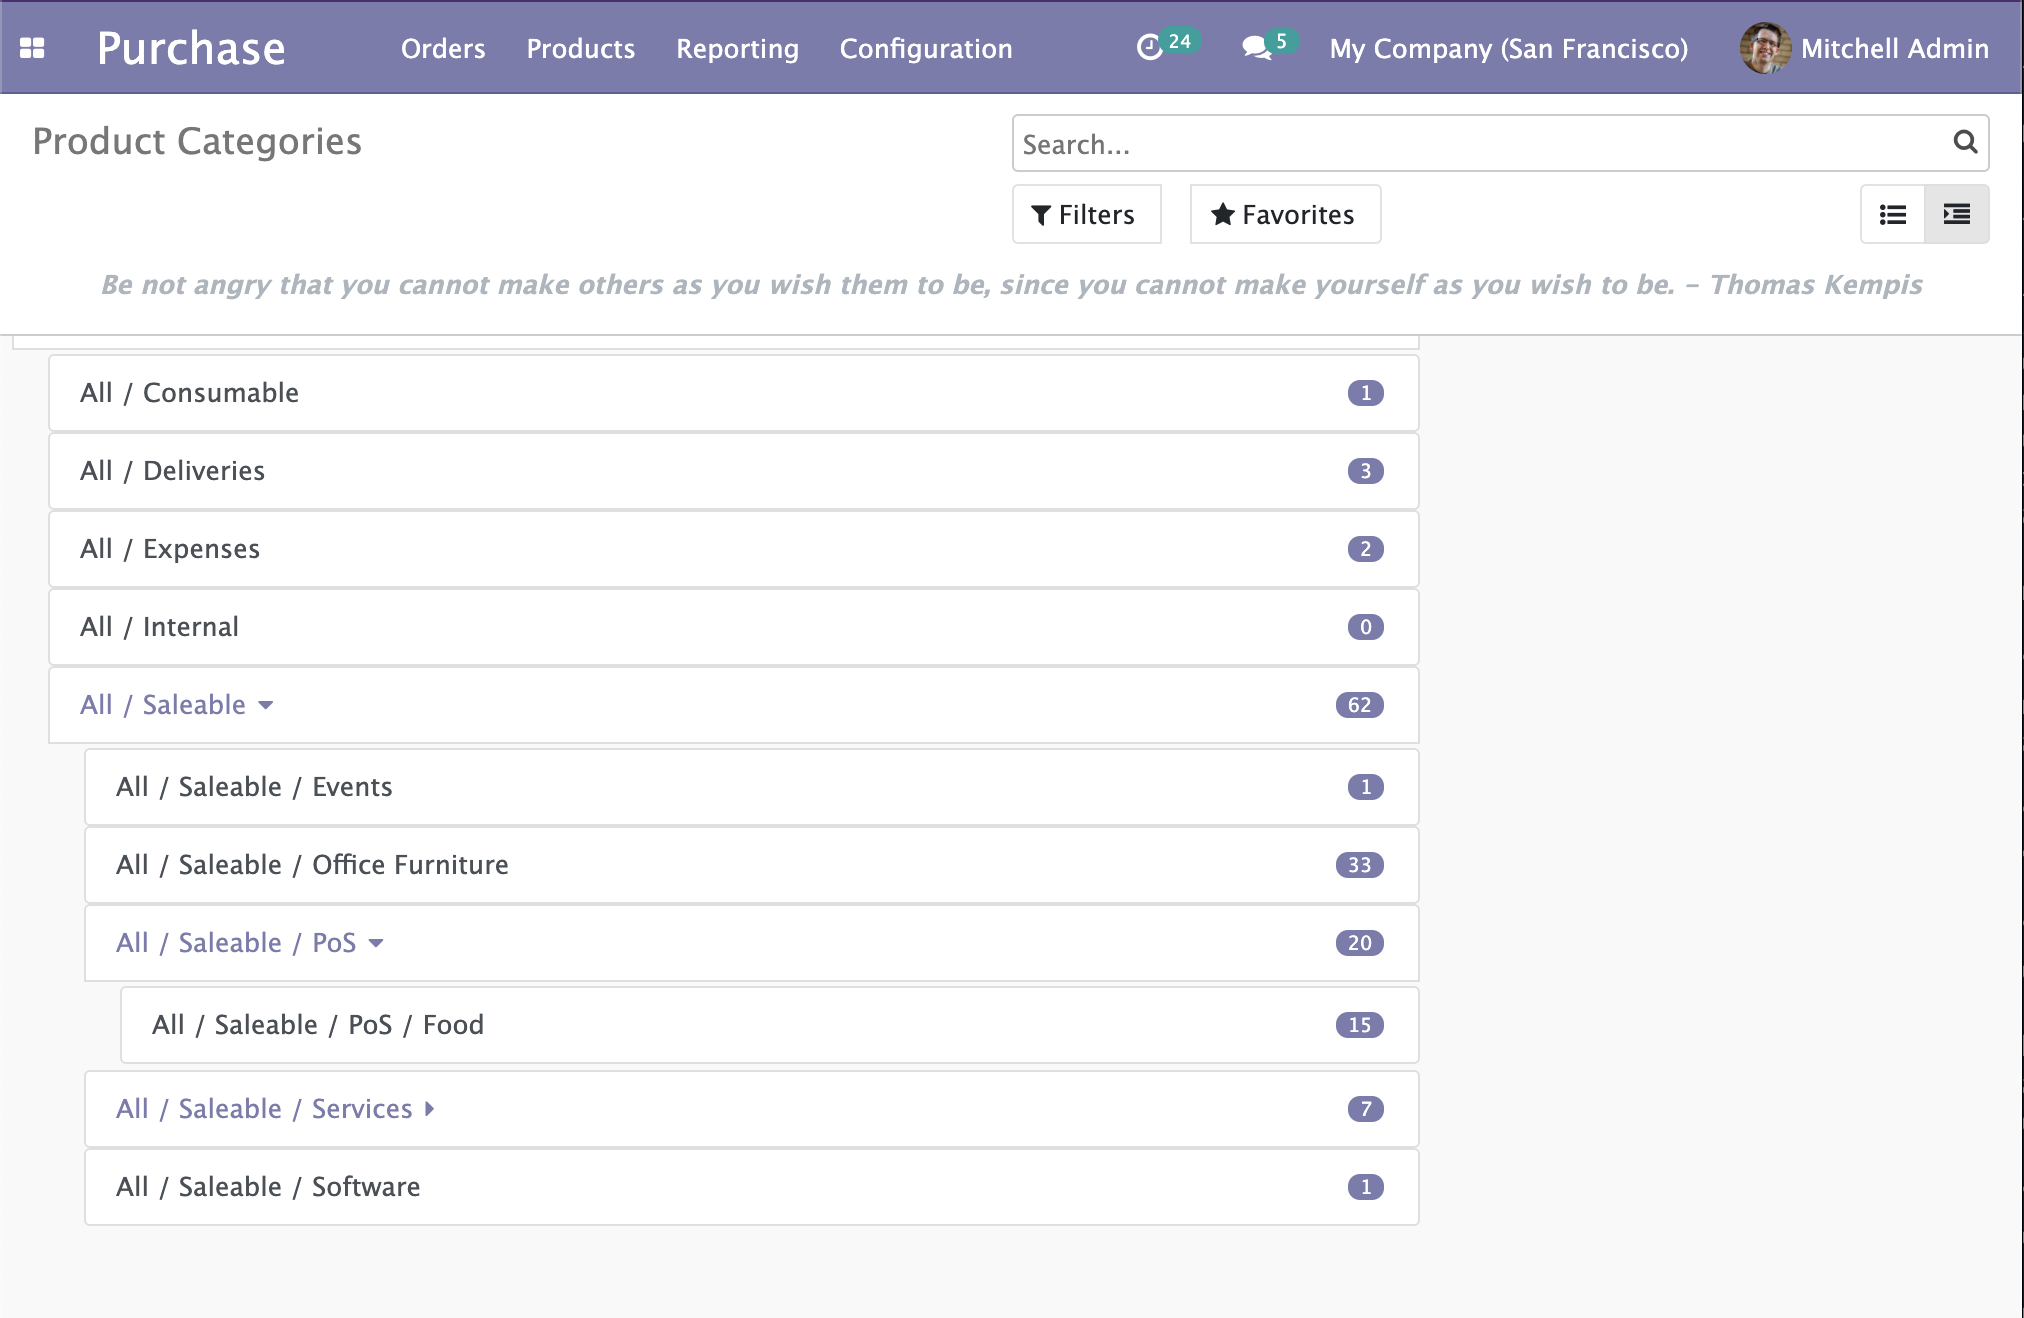
Now we should have a working module already. If you followed this tutorial, you can go into Purchase / Configuration / Products / Products Categories to see our view in action:
But the problem is that only the Root category is shown and nothing else. If we take a look at what is given as a prop to our TreeItem we see that:
{
    "id": 1,
    "name": "All",
    "complete_name": "All",
    "parent_id": false,
    "parent_path": "1/",
    "child_id": [
        9,
        12,
        3,
        4,
        2
    ],
    "product_count": 69,
    "display_name": "All",
    // Other odoo fields
}
There is a child_id property containing the IDs of the child items but it is just an array of integers for now.
What we will do is create another property called children that will be an array of Objects like the parent that we will fetch from the Server. The goal is to fill this same global items object that will contain all the nested children.
Clicking on a TreeItem to fetch and display the Children
Introduction
We have to evolve our TreeItem component, and these are the main guidelines:
- The TreeItem component should have a boolean
childrenVisiblein its state that will be used in the template to check if the TreeItem's children are visible or not. - The TreeItem component should be clickable if it has children, to open it.
- The TreeItem component should trigger an event to indicate that we need to fetch data from the server: getting children as full objects.
- The TreeItem should display a little arrow/caret if it is expanded or collapsed.
Updating the TreeItem template
We will change the way the name of the TreeItem is displayed, if the Item has children it will be a link with a bound action, or else it will be a regular span. Change the <span t-esc="props.item.display_name"/> for that:
<a href="#" t-on-click.stop.prevent="toggleChildren" t-if="props.item.child_id.length > 0">
    <t t-esc="props.item.display_name"/>
    <i t-attf-class="pl-2 fa {{ state.childrenVisible ? 'fa-caret-down': 'fa-caret-right'}}" ></i>
</a>
<span t-else="">
    <t t-esc="props.item.display_name"/>
</span>
As you can see we also do the caret-down/caret-right logic with the childrenVisible boolean that we will soon add to the TreeItem Component.
We also declared the function toggleChildren as a handler for the click action with t-on-click.stop.prevent="toggleChildren". The .stop and .prevent are OWL little useful shortcuts directives so we don't have to write in our function the usual event.preventDefault or stopPropagation.
We also update the wrapper around the for each loop for the children to only show if the boolean childrenVisible is at true:
<t t-if="props.item.child_id.length > 0">
    <div class="d-flex pl-4 py-1 flex-row treeview" t-if="props.item.children and props.item.children.length > 0 and state.childrenVisible">
        <div class="list-group">
            <t t-foreach="props.item.children" t-as="child_item">
                <TreeItem item="child_item"/>
            </t>
        </div>
    </div>
</t>
For now, props.item.children is always empty because it doesn't exist in the standard response coming from the server. We have to add it ourselves to the result when the intention to fetchData is resolved.
Adding "toggleChildren" function to the TreeItem Component.
Now we update our Component to have "childrenVisible" in its state and, we add the "toggleChildren" function:
odoo.define(
  "owl_tutorial_views/static/src/components/tree_item/TreeItem.js",
  function (require) {
    "use strict";
    const { Component } = owl;
    const patchMixin = require("web.patchMixin");

    const { useState } = owl.hooks;

    class TreeItem extends Component {
      /**
       * @override
       */
      constructor(...args) {
        super(...args);
        this.state = useState({
          childrenVisible: false,
        });
      }

      toggleChildren() {
        if (
          this.props.item.child_id.length > 0 &&
          this.props.item.children == undefined
        ) {
          this.trigger("tree_item_clicked", { data: this.props.item });
        }
        Object.assign(this.state, {
          childrenVisible: !this.state.childrenVisible,
        });
      }
    }

    Object.assign(TreeItem, {
      components: { TreeItem },
      props: {
        item: {},
      },
      template: "owl_tutorial_views.TreeItem",
    });

    return patchMixin(TreeItem);
  }
);
The toggleChildren function first checks if the children are already filled. If not, it will trigger an event named "tree_item_clicked". Then it toggles the state "childrenVisible".
Catching the custom event in the Controller
Inside our owl_tree_controller.js:
odoo.define("owl_tutorial_views.OWLTreeController", function (require) {
  "use strict";

  var AbstractController = require("web.AbstractController");

  var OWLTreeController = AbstractController.extend({
    // We register the custom_events here
    custom_events: _.extend({}, AbstractController.prototype.custom_events, {
      // The TreeItem event we triggered
      tree_item_clicked: "_onTreeItemClicked",
    }),

    /**
     * @override
     * @param parent
     * @param model
     * @param renderer
     * @param {Object} params
     */
    init: function (parent, model, renderer, params) {
      this._super.apply(this, arguments);
    },

    /**
     * When an item is clicked the controller call the Model to fetch
     * the item's children and display them in the tree via the call
     * to the update() function.
     *
     * @param {Object} ev
     * @param {Object} ev.data contains the payload
     */
    _onTreeItemClicked: async function (ev) {
      ev.stopPropagation();
      await this.model.expandChildrenOf(
        ev.data.data.id,
        ev.data.data.parent_path
      );
      this.update({}, { reload: false });
    },
  });

  return OWLTreeController;
});
We registered custom events with exactly the same name as the event we fired from the OWL TreeItem Component, and bind it to a function.
_onTreeItemClicked is an async function but it will wait for the model RPC call via the await keyword before it triggers its rendering update with the update call.
This Model function expandChildrenOf doesn't exist yet on our Model so we will create it.
Fetching children from the Model and placing it in the tree.
Our expandChildrenOf function will take 2 parameters:
- The actual ID of the item we want to expand (example category ID)
- The
parent_pathof the item. Parent Path is a string representation of the nesting position of the item.
For example, let's say you have a category of id 321, that has a parent of id 23. And, category 23 has a parent of id 2.
Then the parent_path of the item will be "2/23/321/".
The parent_path will be our saving grace to actually navigate the tree and find the node we want relatively quickly, or at least without going through every branche recursively to find one item.
Add these new functions to owl_tree_model.js
  const OWLTreeModel = AbstractModel.extend({
    /**
     * Make a RPC call to get the child of the target itm then navigates
     * the nodes to the target the item and assign its "children" property
     * to the result of the RPC call.
     *
     * @param {integer} parentId Category we will "open/expand"
     * @param {string} path The parent_path represents the parents ids like "1/3/32/123/"
     */
    expandChildrenOf: async function (parentId, path) {
      var self = this;
      await this._rpc({
        model: this.modelName,
        method: "search_read",
        kwargs: {
          domain: [["parent_id", "=", parentId]],
        },
      }).then(function (children) {
        var target_node = self.__target_parent_node_with_path(
          path.split("/").filter((i) => i),
          self.data.items
        );
        target_node.children = children;
      });
    },

    /**
     * Search for the Node corresponding to the given path.
     * Paths are present in the property `parent_path` of any nested item they are
     * in the form "1/3/32/123/" we have to split the string to manipulate an Array.
     * Each item in the Array will correspond to an item ID in the tree, each one
     * level deeper than the last.
     *
     * @private
     * @param {Array} path for example ["1", "3", "32", "123"]
     * @param {Array} items the items to search in
     * @param {integer} n The current index of deep inside the tree
     * @returns {Object|undefined} the tree Node corresponding to the path
     **/
    __target_parent_node_with_path: function (path, items, n = 0) {
      for (const item of items) {
        if (item.id == parseInt(path[n])) {
          if (n < path.length - 1) {
            return this.__target_parent_node_with_path(
              path,
              item.children,
              n + 1
            );
          } else {
            return item;
          }
        }
      }
      return undefined;
    },
The function to expand children is very straightforward, it will fetch items from the model with the domain containing parent_id as the current item. Then the tricky part is to "open/expand" the node inside self.data.items.
The function __target_parent_node_with_path will actually explore the self.data.items until it finds the item we are currently opening. When it finds that node it will return it.
This returned item is a direct reference to the item inside the global data.items of the Model.
So when we fill the children with target_node.children = children we are actually updating the global this.data.items of the Model class. Meaning that when the Controller updates, it will also pass the new opened items to the OWL Renderer as props.
With that done, we connected every piece necessary to handle the click on the Item, try your module and check if it is working:
Making the "count badge pill field" dynamic
You may have noticed that in our first iteration of this view the TreeItem Component Template was actually displaying the count badge like that:
<span class="badge badge-primary badge-pill" t-esc="props.item.product_count">4</span>We are working with categories as an example but this implementation is problematic because we are using a field named product_count that doesn't exist on other Models.
We would like our View to be usable on any model that has parent/child relationships, but we don't want to force the presence of any other field than the basic Odoo ones.
Getting XML attrs from templates into the Renderer.
Let's update our product_views.xml file to actually write the end result we would like to work with:
    <record id="product_category_view_owl_tree_view" model="ir.ui.view">
        <field name="name">Product Categories</field>
        <field name="model">product.category</field>
        <field name="arch" type="xml">
            <owl_tree count_field="product_count"></owl_tree>
        </field>
</record>You actually have access to the attributes passed inside the XML like that from the Renderer. To do so we will edit our owl_tree_renderer.js:
  class OWLTreeRenderer extends AbstractRendererOwl {
    constructor(parent, props) {
      super(...arguments);
      this.qweb = new QWeb(this.env.isDebug(), { _s: session.origin });
      this.state = useState({
        localItems: props.items || [],
        countField: "",
      });
      if (this.props.arch.attrs.count_field) {
        Object.assign(this.state, {
          countField: this.props.arch.attrs.count_field,
        });
      }
    }
The props contain the XML arch data already transformed into a JavaScript object and filled with the attrs key.
The attrs are the attributes that we would add inside our XML Markup, so here we check if a count_field is defined, and if so, we assign it to the state.
We also update the owl_tree_view.xml file to pass the newly created countField.
<div t-name="owl_tutorial_views.OWLTreeRenderer" class="o_owl_tree_view" owl="1">
    <div class="d-flex p-2 flex-row owl-tree-root">
        <div class="list-group">
            <t t-foreach="props.items" t-as="item">
                <TreeItem item="item" countField="state.countField"/>
            </t>
        </div>
    </div>
</div>
Using the count_field in the TreeItem Components
Let's go back into our TreeItem.js and declare a new prop:
Object.assign(TreeItem, {
  components: { TreeItem },
  props: {
    item: {},
    countField: "", // Comming from the view arch
  },
  template: "owl_tutorial_views.TreeItem",
});
And now we replace the usage inside the QWeb template TreeItem.xml to use the actual dynamic field from the attrs.
<span
    t-if="props.countField !== '' and props.item.hasOwnProperty(props.countField)"
    class="badge badge-primary badge-pill"
    t-esc="props.item[props.countField]">
</span>
We first check if countField is filled with something else than an empty string. Then, we check if it also is present as a property on our item Object to avoid errors with the hasOwnProperty object method.
If everything is okay, we can access the property dynamically via the []operator on a JS Object.
owl.__info__.
For this tutorial, the code is working on any OWL version >= 1.2.4. 1.2.3 Is known to not work so please consider updating your Odoo or changing the owl.js file.Conclusion
We now have a functional OWL View that we created from scratch. The problem is that this view doesn't really do anything and is purely presentation for now. We have to add some interactivity to that View!
But that's enough for that part of the tutorial. The source code for this chapter is available here and you can clone directly that branch to continue exactly where we stopped here with git:
git clone -b basic-rendering-component https://github.com/Coding-Dodo/owl_tutorial_views.gitAs I showed you in the introductory screenshot there will be drag and drop to handle the parent_id change of items in a pleasant manner. You can already try to do it by yourself, and if you are very curious the code is actually already here on the main branch.
In the next part we will:
- Integrate the drag and drop functionality with the help of the standard HTML Drag and Drop API. We will see how to listen to these events in OWL Component and handle data fetching.
- You may have noticed some weird behavior when you reload the View, like the tree node staying opened. We will implement a
resetStatefunction to handle these cases. - Finally, we may expand the functionalities of our View to let the user do more editing.
The next part will be subscriber-only, so consider joining us!
